Tuesday, November 29, 2011

Scallop Buying Guide


We had pan-seared scallops last night (http://terrygruggen.blogspot.com/2011/05/pan-seared-scallops.html). They were spectacular because they were fresh...as in never frozen. They were shipped right from the sea to Byerly's with no chemical intervention by man.

Fresh scallops look like the photo above. Note that they are dry, which is precisely why they are referred to as "dry scallops". If you set them on a paper towel, they give off next-to-no liquid. When you cook them up, they are sweet. They taste like the ocean.


The scallops in the above photo are not fresh. They have been previously frozen. They are referred to as "wet scallops" and when you see them in the store they are often sitting in a white, creamy liquid. They have been treated with a preservative and whitening agent called sodium tripolyphosphate (STP). If you put them on a paper towel, they will give off a ton of liquid. STP increases the water retained by the scallop, often by as much as 30%. So frozen scallops end up being a poor value, compared to fresh, as you are paying for a lot of water.

Sodium tripolyphosphate gives the scallop an unpleasant chemical flavor. It's impossible to get rid of that taste. Your only choice is to mask it by pre-soaking the scallops in a mix of water, lemon juice and salt*. If you care about putting the best tasting and healthiest scallops in your mouth, buy only fresh. There is a world of difference and it will take you but a single bite to discover it.


*Mix 1 quart cold water, 1/4 cup lemon juice and 2 tablespoons salt and soak scallops for 30 minutes. 


Monday, November 28, 2011

Steamed Artichokes with Melted Butter


Artichokes are one of my favorite vegetables. Most people balk at cooking them because they look ungainly and think they have to be difficult to prepare. Nothing could be further from the truth. If you can hold a knife and boil water, you have all of the skills necessary to cook an artichoke.

We're coming into the time of year when artichokes are in their prime. They're big and the base of the leaves contains prodigious amounts of the tender meat. The light, mellow flavor of artichokes goes especially well with poultry and seafood. I'm making them this evening to go along with pan seared scallops (http://terrygruggen.blogspot.com/2011/05/pan-seared-scallops.html).

The prep is easy. Cut the stem off as close to the bottom of the artichoke as possible. Then cut the top off, approximately 1 inch down. The top should look like this when you are done:


Then all you need is a steamer basket and a small pot to melt the butter in and you are off to the races. This recipe serves four. Remember to put a bowl or two on the table for people to dispose of their consumed leaves.


Ingredients
4 whole artichokes
2 sticks salted butter*

Directions for Cooking
  1. Bring water to boil in a large steamer basket.
  2. Cut stems off bottom of artichokes and trim 1 inch off the top of the artichoke.
  3. Place artichokes in steamer basket, cover and cook for 45 minutes.
  4. While artichokes are steaming, melt butter in a small pot.
  5. When done cooking, place artichokes upright in 4 small bowls. Divide butter among four, separate small bowls and serve.
Directions for Eating
To eat, pull off a leaf and dip the large end of the leaf in melted butter. Scrape the meat off the tender end of the leaf with your front teeth. When you reach the center cone of purple prickly leaves, remove it. This is the choke that protects the heart. Now, scrape away the thistle fuzz covering the artichoke heart. The heart is the meatiest part of the artichoke. Remove it from the artichoke, dip it in butter and enjoy!


The artichoke heart


*If so desired, add some fresh lemon juice to the melted butter.

Sunday, November 27, 2011

A Favorite Pinot Noir


My toddler/early childhood years were spent in Richfield, MN. 6524 Irving Avenue South to be precise. It was the first house my family ever owned. We were less than a decade removed from the end of WWII and the Korean war was in full swing. But those wars meant nothing to me at the time...the focus of my entire existence was the Creek Indian War.

I spent the vast majority of my time at 6524 Irving thinking about the Creek Indian War. Every chance I got I was out on the swing set in the backyard, singing at the top of my lungs. Singing about the hero of the Creek Indian War, Davy Crockett.

In December of 1954, Disney had launched a new TV show called "Davy Crockett, King of the Wild Frontier." Starring Fess Parker, the show ran for 6 seasons and spawned a full-length motion picture. It became my obsession. I spent every waking moment playing Davy Crockett. To this day, my father talks about his memory of me swinging on the swing set, coonskin cap on my head, singing the Davy Crockett theme song, over and over and over and over. I could never get enough.

This last November, my wine cellar was running low on Pinot Noir, so I decided to pit my old favorite against eight, new Pinot Noirs that I had never tasted before. Over the course of three weeks I paired the new ones up with different dinners, hoping that a few winners might emerge.

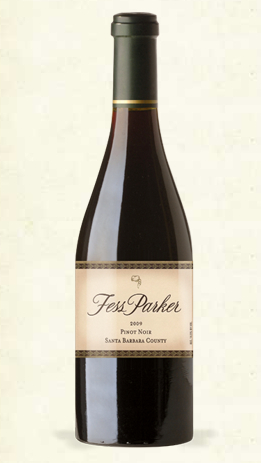
None of them stood up to my every day favorite, Fess Parker Santa Barbara County Pinot Noir. While Willamette Valley Pinot Noirs from Oregon have always been my favorite, it's all but impossible to find a decent one of those south of $30. The Fess Parker wine retails for $28, but I routinely get it for $23 when I buy it by the case.

Fess Parker, star of that 1950's Disney TV show, "Davy Crockett, King of the Wild Frontier", started his winery in 1987, 27 years after the series was canceled.  His 714 acre vineyard has won numerous awards through the years. He died in 2010 and the winery is currently run by his son, Eli (Fess III) and his daughter, Ashley. At the time of his death, he was survived by his wife, his 2 children, 11 grandchildren, 1 great grandchild and me, his ever-adoring fan. And every time I take a sip of his exceptional wine, 57 years of memories come rushing back.

The Fess Parker Santa Barbara County Pinot Noir is incredibly rich and thick on the tongue. You'll taste black cherry, cranberry, mocha, vanilla and a hint of chocolate. It's aged in French oak for 10 months and the 2009 vintage is ready to drink right now. I find the wine tastes even better if you drink it while wearing a coonskin cap.


Born on a mountain top in Tennessee,
Greenest state in the land of the free.
Raised in the woods so's he knew every tree,
Killed him a bear when he was only three.
Davy, Davy Crockett King of the Wild Frontier.

He fought single handed through the Injun war,
Till the Creeks was whipped and peace was restored.
And while he was handling this risky chore,
Made himself a legend, forevermore.
Davy, Davy Crockett the man who don't know fear.

When he lost his love, and his grief was gall,
In his heart he wanted to leave it all,
And lose himself in the forest tall,
But he answered instead, his country's call.
Davy, Davy Crockett, the choice of the whole frontier

He went off to Congress and served a spell
Fixin' up the government and laws as well.
Took over Washington, so we hear tell,
And patched up the crack in the Liberty Bell.
Davy, Davy Crockett, seein' his duty clear. (Serving his country well)

When he come home, his politickin' done,
The western march had just begun.
So he packed his gear, and his trusty gun
And lit out a grinnin' to follow the sun.
Davy, Davy Crockett, Leadin the Pioneers.

His land is biggest, and his land is best
From grassy plains to the mountain crest
He's ahead of us all in meeting the test
Followin' his legend right into the West
Davy, Davy Crockett, King of the Wide Frontier
King of the Wild Frontier.


Saturday, November 26, 2011

Chicken Breast Sauté in Chive Cream Sauce


The cream in this sauce is sour cream and it makes for one incredible sauce. While it tastes rich beyond belief, this is actually a very healthy meal. If you so desire, you can make it a little less healthy by including some crusty bread to dip in the sauce.

For those of you that have made my grilled chicken breast recipe, we are going to follow a lot of the same protocol here. The key thing is we are going to pound the kitchen breasts with a mallet to make them the uniform thickness. That makes the sautéing part a whole lot easier...each breast is uniform and requires the identical cooking time.

I found this recipe in Eating Well Magazine back in January of 2006. I often serve it with sautéed asparagus spears or  "Mock Garlic Mashed Potatoes" (http://terrygruggen.blogspot.com/2011/02/mock-garlic-mashed-potatoes.html). This recipe serves four and takes about 35 minutes from start of prep to finish.

Ingredients
4 boneless, skinless chicken breasts
1 teaspoon Kosher salt
1/4 cup flour plus 1 tablespoon
3 tablespoons extra virgin olive oil
2 large shallots, minced
1/2 cup dry white wine
14 ounces chicken broth
1/3 cup sour cream
1 tablespoon Dijon mustard
1/2 cup chopped chives

Directions

  1. Place chicken between sheets of plastic wrap and pound with a meat mallet or heavy skillet until flattened to an even thickness, about 1/2 inch. Season both sides of the chicken with 1/2 teaspoon salt. Place 1/4 cup flour in a shallow glass baking dish and dredge the chicken in it. Discard the excess flour.
  2. Heat 2 teaspoons oil in a large nonstick skillet over medium-high heat. Add the chicken and cook until golden brown, 1 to 2 minutes per side. Transfer to a plate, cover and keep warm.
  3. Heat the remaining 1 teaspoon oil in the pan over medium-high heat. Add shallots and cook, stirring constantly and scraping up any browned bits, until golden brown, 1 to 2 minutes. Sprinkle with the remaining 1 tablespoon flour; stir to coat. Add wine, broth and the remaining 1/2 teaspoon salt; bring to a boil, stirring often.
  4. Return the chicken and any accumulated juices to the pan, reduce heat to a simmer, and cook until heated through and no longer pink in the center, about 6 minutes. Stir in sour cream and mustard until smooth; turn the chicken to coat with the sauce. Stir in chives and serve immediately.


Wine pairing: I would recommend an "unoaked" chardonnay. Try Toad Hollow "Francine's Selection".


Tuesday, November 22, 2011

Easy Roasted Turkey


I'm going old school this year...the way I first started cooking turkey back in the early 80's. I'm going to use a cooking bag. First, because it is just so easy. Second, because it gives you a fantastic, moist turkey without all of the problems associated with brining.


Traditional roasting of a turkey gives you that incredible mahogany skin...a thing of true beauty. But if you roast big birds like I do (20+ pounds), the turkey is going to really dry out in the oven. So to compensate for the loss of moisture associated with conventional roasting of big birds, you need to brine the turkey. I find brining a huge hassle. Great results, but a huge hassle. Consider that you will need one gargantuan vessel to brine it in. And when you are done brining, that vessel and it's liquid will be more toxic than the Love Canal.


So I'm breaking out the Reynolds Oven Bags...turkey size...made to handle 8-24 pound birds. Open the bag, toss in a tablespoon of flour, a little celery, a little onion, one huge honkin' turkey and three hours later that 21 pound turkey is done. Pop it out of the oven, let it rest for 15 minutes and then carve it up. You will be amazed at how moist and delicious the turkey is. The key?  The oven bag holds in all of the moisture during cooking.


Ingredients
1 turkey (12-24 pounds*)
1 tablespoon flour
2 stalks celery, sliced
1 medium onion, sliced
Olive oil
2 tablespoons paprika
1 Reynolds oven bag (turkey size)

Directions

  1. Preheat oven to 350º.
  2. Shake flour in Reynolds Oven Bag; place in roasting pan at least 2 inches deep. Spray inside of bag with nonstick spray to reduce sticking, if desired.
  3. Add vegetables to oven bag. Remove neck and giblets from turkey. Rinse turkey; pat dry. Brush turkey with olive oil. Sprinkle turkey with paprika. Place turkey in bag on top of vegetables.
  4. Close oven bag with nylon tie; cut six 1/2–inch slits in top. Tuck ends of bag in pan.
  5. Bake 2 to 2 1/2 hours for a 12 to 16 lb. turkey, 2 1/2 to 3 hours for a 16 to 20 lb. turkey, and 3 to 3 1/2 hours for a 20 to 24 lb. turkey. Remove from oven and let stand in oven bag 15 minutes. If turkey sticks to bag, gently loosen bag from turkey before opening oven bag. Remove bag, carve and serve.

Estimate 2 pounds per person for generous servings with leftovers.


Wine pairing: For white, I recommend a Riesling. For red, choose a Pinot Noir or Syrah.


Making the stuffing on Thanksgiving day.

Tuesday, November 15, 2011

Peel and Eat BBQ Shrimp


I'm a big fan of Bobby Flay. I think I have seen every single "Boy Meets Grill" show that he has filmed for the Food Network. My favorites are the ones where he appears with his lovely wife, Stephanie March, of "Law and Order: Special Victims Unit" fame. It's not that she brings a lot to the food party, I just happen to find her much more attractive than Bobby.

This Bobby Flay recipe works great for serving appetizers to a large crowd or entree portions for 8-10. Because shrimp cook so quickly, you can easily use a grill pan to make this recipe on your stove top (http://terrygruggen.blogspot.com/2010/11/my-beloved-grill-pan.html). After you heat the grill pan, your shrimp are ready in just 4 minutes. However, if you are so inclined, feel free to fire up your outdoor grill and make a full-fledged production out of it. Toss on some mesquite for a smoky flavor!

Buy fresh shrimp that are 21 to 24 pieces per pound and make sure that they have the shells on. The secret to peel and eat shrimp is the "peel" part. It gets the delicious spices all over your fingers and flavors every single morsel of shrimp that you pop in your mouth. You'll also need skewers. While I prefer metal skewers, you can also use wood ones that have been soaked in water for 20-30 minutes.

Ingredients
1/4 cup smoked sweet paprika
2 tablespoons ancho chili powder
2 tablespoons brown sugar
2 teaspoons ground cumin
6 cloves garlic, coarsely chopped
3 tablespoons canola oil
2 teaspoons Kosher salt
1 teaspoon fresh ground black
2 pounds shrimp (21-24 count, shell on)

Directions

  1. Whisk together the paprika, ancho powder, brown sugar, cumin, garlic, canola oil, salt and pepper in a small bowl.
  2. Place shrimp in a large bowl, add the spice rub and and stir well to coat each shrimp.
  3. Heat your grill pan (or grill) to high.
  4. Skewer shrimp and place on grill pan for 4 minutes, flipping skewers half way through.
  5. Remove shrimp from skewers and place on large serving platter.

Pairing:  Sauvignon Blanc or ice cold beer.


Bobby Flay and Stephanie March

Saturday, November 12, 2011

Roasted Carrots


"Did you ever stop to taste a carrot? Not just eat it, but taste it?
You can't taste the beauty and energy of the earth in a Twinkie."
Astria Alauda


First, make sure the carrots are nice and dry. Wet carrots will not caramelize.  Second, pick carrots that are as close to uniform in size as possible. Trim and halve them as necessary. This will ensure even cooking and browning. Third, if available, pick baby carrots with the greens still attached. Carrots that have the greens attached are always the freshest (it means they were plucked from the earth within the last three weeks). This Cook's Illustrated recipe serves 4-6 people (go here if you'd like to subscribe to Cook's Illustrated: www.cooksillustrated.com).


Ingredients
1 1/2 pounds carrots, green tops removed
2 tablespoons butter, melted
1 teaspoon Kosher salt
1/2 teaspoon fresh cracked pepper

Directions

  1. Adjust oven rack to middle position and heat oven to 425º. 
  2. In large bowl, combine carrots with butter, salt, and pepper. Toss to coat. Transfer carrots to foil-lined, rimmed baking sheet and spread in single layer.
  3. Cover baking sheet tightly with foil and cook for 15 minutes. Remove foil and continue to cook, stirring twice, until carrots are well browned and tender, 30 to 35 minutes. 
  4. Transfer to serving platter and serve. 

Herb-Crusted Pork Rib Roast


This is a spectacular cut of meat. Also known as "rack of pork", it is the pork equivalent of the beef "standing rib roast" (source of prime rib and bone-in rib eye). It's incredibly easy to make and I guarantee it will be a huge hit at the dinner table.

For those of you that follow this blog, it will be no shock that I buy this cut at Costco. It's only $3.99 a pound there which compares quite favorably to the $7.99 a pound price point you will find at most grocery stores. During the holiday season, this cut is tarted up and sold as a "Crown Roast of Pork" and the price for that little bit of marketing madness will push it close to $20 a pound. Go buy it at Costco and use the savings to buy yourself a really nice bottle of wine or half-a-tank of gas.

When you serve it, you'll simply slice between the ribs and give each person a "bone-in" cut. The meat cooking next to the bone imparts incredible flavor and the "bone-in" cut makes for a spectacular plate presentation. No wonder that this is a favorite dish for company: it looks great, tastes great, it's easy to cook and easy on the pocketbook.

This is another Frankenrecipe: one I've put together from several different sources. Make sure you use a pan with a roasting rack for this dish...you want it to brown all over while it cooks. It will serve 6-8 people and it's mild flavor makes it pair really well with roasted vegetables (especially those high in sugar content...like roasted carrots: http://terrygruggen.blogspot.com/2011/11/roasted-carrots.html).

Roast Ingredients
1 pork rib roast, 5-7 pounds
1/2 cup Dijon mustard

Herb Rub Ingredients
1/1/2 teaspoons dried sage
1 1/2 teaspoons dried thyme
1 1/2 teaspoons dried rosemary
1 teaspoon granulated garlic
1 teaspoon Kosher salt
1/2 teaspoon fresh cracked pepper

Directions

  1. Preheat oven to 450º.
  2. Combine rub ingredients in a small bowl and stir well to mix.
  3. Rub Dijon mustard over exterior of pork roast, then sprinkle rub generously on top of the mustard coating.
  4. Place roast in a roasting rack with the bone side on top (just like the photo above).
  5. Put roast in oven and cook for 15 minutes at 450º.
  6. Reduce oven temperature to 350º and cook for another 85 minutes.
  7. Remove roast from oven, tent loosely with foil and let roast rest for 10 minutes.
  8. Remove foil, slice between the rib bones and serve.
Wine pairing: Pinot Noir, Syrah or Merlot


Sunday, November 6, 2011

Roasted Brussels Sprouts


The bad news: My good friend Sparky (Todd Marella) had a heart attack last week. The good news: He is still alive and kicking. Fortunately, Sparky likes veggies and one of his favorites is the Brussels sprout.

Cook's Illustrated was nice enough to feature a new Brussels sprouts recipe in this month's issue of their magazine and I've taken the liberty of sharing it here. This is a very heart healthy recipe, except for, perhaps, the dusting of Parmesan cheese that comes at the end. So Sparky, enjoy this recipe this week, but skip the Parmesan. Here's to your quick recovery!

Brussels sprouts first appeared in Belgium around the 13th century. They are a member of the cabbage, broccoli and kale family. They are very high in Vitamins A and C, folic acid and dietary fiber. They are also believed to protect against colon cancer because they contain sinigrin. I love them raw in salads but have developed a true liking to the nutty sweetness that this recipe yields. This recipe will serve 6 to 8 people.

Ingredients
2 1/4 pounds Brussels sprouts, trimmed and halved
3 tablespoons extra virgin olive oil plus 3 additional tablespoons
1 tablespoon water
Salt and pepper
4 garlic cloves, minced
1/2 teaspoon red pepper flakes
1/4 cup grated Parmesan cheese

Directions

  1. Adjust oven rack to upper-middle position and heat oven to 500 degrees. Toss Brussels sprouts, 3 tablespoons oil, water, ¾ teaspoon salt, and ¼ teaspoon pepper in large bowl until sprouts are coated. Transfer sprouts to rimmed baking sheet and arrange so cut sides are facing down. Cover sheet tightly with aluminum foil and roast for 10 minutes.
  2. Heat remaining 3 tablespoons of oil in 8-inch skillet over medium heat until shimmering. Add garlic and red pepper flakes; cook until garlic is golden and fragrant, about 1 minute. Remove from heat.
  3. Remove foil and continue to cook until Brussels sprouts are well browned and tender, 10 to 12 minutes. Transfer to serving platter, toss with garlic oil, and season with salt and pepper to taste. Sprinkle with Parmesan and serve.

Note: If you bought Garlic Olive Oil from Costco last summer and still have it on hand, you can basically  delete the garlic cloves from the recipe and skip step #2. Simply pour 3 tablespoons of garlic olive oil in a small pot, add red pepper flakes and then heat the oil.


Sparky's videogame avatar

Saturday, November 5, 2011

Bacon Made Easy


 "Is it Bacon Day?
Homer Simpson


Cooking bacon can be a messy affair. We gave it up years ago and when we started buying Kirkland Fully Cooked Bacon at Costco. It's made by Hormel. It's thick cut, naturally wood smoked and really tasty stuff. 

Talk about fast, you can cook (i.e., heat up) ten pieces in the microwave in just 45 seconds. I usually have two pieces for breakfast each morning and that takes just 15 seconds in the microwave. There's no fuss, no muss and no having to dispose of hot bacon grease. 

The package you see above contains a pound of cooked bacon (which equals roughly 2 pounds of uncooked bacon). It sells for $10.99 and inside the resealable pouch are approximately 50 strips of bacon. A pound of good, uncooked bacon typically costs $4.99...so you basically pay $1.00 extra for the privilege of not cooking. That's a really good deal!


Emberger Royal with Fries


Back in the late 1960's, there was a chain of restaurants in Minnesota called Embers. While they managed to survive for some 30+ years past that, they are gone now. My favorite Embers used to sit at 7700 Normandale Boulevard in Edina. Time has erased any trace of the restaurant and that location now hosts a DQ Chill and Grill. Oh, the horror.

I was a student at Edina High School at the time. The Edina football program in the 60's was the equivalent of Eden Prairie today. Under the tutelage of Stav Canakes, the Edina Hornets dominated the Lake Conference. So every Friday night that Edina played a home game, there were two things that were certain. We'd see a great football game under the lights at the Edina High School field and then we'd head to Embers for an Emberger Royal with fries. While us skinny, little 146-pound soccer players could not play football, we could do our best to eat like a lineman.

The Emberger Royal was the quintessential bacon cheeseburger with BBQ sauce. While their recipe called for a quarter pound burger, we will be using a third pound burger for our homemade version. And not just any third pound burger, mind you, but the king of all third pound burgers...Kirkland Signature Sirloin Burgers from Costco. These burgers are so friggin' delicious for two simple reasons: they are made from sirloin steak and they have a 35% fat content. These are the tastiest pre-made burgers on the market today. The only way to beat the taste is to grind your own...a laborious process.

The other trick to making this great meal at home is to have really good fries. Unless you have a deep fryer and an affinity for cleaning up kitchen grease, it's hard to get restaurant quality fries at home. But I have found one product that comes really close and it's easy to make the fries as you bake them in your oven. The product is Ore Ida Extra Crispy Fast Food Fries. I've found that by cooking them on two rimmed baking pans (so they are not crowded) for 24 minutes and letting them rest for 4 minutes gives you perfect homemade fries every time.

This recipe serves four, contains no calories and is both carbohydrate and cholesterol free.


Ingredients
4 Kirkland Signature Sirloin Burger patties
8 strips bacon*
4 slices cheddar cheese
4 tablespoons of your favorite BBQ sauce (I like Ken Davis)
4 sesame seed buns
Salt and pepper to taste
1, 26 ounce bag Ore Ida Extra Crispy Fast Food Fries

Directions
  1. Pre-heat oven to 450º.
  2. Heat a large skillet over medium high heat. When hot, add bacon strips and cook until crisp. Put cooked bacon strips on paper towels. (Alternately, you could roast the bacon in your 450º oven for 6-10 minutes, depending on bacon thickness.)
  3. Use two large rimmed baking sheets (or cookie sheets) and put half of the fries on one and the other half on the other. Slide the two pans into the oven (on different racks). Switch rack positions 12 minutes into the cooking process. After 24 minutes, remove the pans and let fries rest for 4 minutes (this will crisp them up).
  4.  To cook the burgers, heat a griddle to 350º. (You may alternately use a large skillet or grill at medium high heat.) Cooking the patties from frozen, cook the first side for 5 minutes. Then flip the burgers, add salt and pepper to taste and top each burger with a slice of cheddar cheese. Cook for 5 more minutes.
  5. Place cooked burgers on sesame seed buns. Top each with two strips of bacon and 1 tablespoon of BBQ sauce.
  6. Salt the fries and divide among serving plates.  

* If you want to do bacon fast and easy, check this out:  http://terrygruggen.blogspot.com/2011/11/bacon-made-easy.html


Wine pairing: Zinfandel